Top Tips to Create and Edit Travel Videos in 2024
Capturing your journey on video is an excellent way to record your travel, narrate a particular tale, or simply showcase the visuals and sounds encountered during your adventures. Whether exploring Egyptian pyramids, New York City's skyscrapers, or Thailand's tropical waters, it is worth mastering the art of creating and editing travel videos that you will enjoy forever.
Creating Great Travel Videos
Get ready for your journey:
Effective travel video creation involves investing time in thoughtful planning. While not as exhilarating as filming or exploring, the preparation phase is crucial for optimizing your time and ensuring quality footage for the best travel video.
Gather motivation:
Begin by gathering inspiration through thorough research on your destination, whether it's Antarctica or Barcelona. This involves understanding weather conditions, exploring architectural points of interest, and immersing yourself in local culture.
Utilize social media platforms like Instagram and Pinterest to curate a folder of bookmarked ideas. Plan efficiently by pinning locations on Google Maps color-coding them by priority, and creating a logical route to enhance your video-making process.
Storyboard and shot list:
Once scouting is complete, envision the narrative arc through storyboarding, using loose sketches or a detailed sequence of shots. Video production is time-sensitive, requiring optimal light, so a well-thought-out game plan is crucial. Storyboarding helps identify necessary shots, facilitating the creation of a shot list.
With a robust storyboard and shot list, constructing a video timeline becomes more manageable. It emphasizes the importance of storytelling over a collection of impressive clips, sometimes enhanced for details using CapCut’s online image upscaler to ensure a cohesive and compelling final product.
Get the camera settings right before the journey:
Maintaining a consistent camera profile during your trip is crucial to avoid post-production complications. Prioritize experimenting with settings before your journey, establishing defaults that suit your preferences. For the Nikon camera, configure memory buttons for 4K, 25fps with picture profile 6 for regular footage and 1080p, 120fps for slow-motion shots. This ensures seamless transitions between modes, facilitating efficient footage capture.
Dedicate time to fine-tune your camera settings, maintaining uniformity throughout your entire trip for a smoother editing process.
Shoot intelligently:
Maximize your shooting during travel but be mindful not to overshoot. Dedicate time to film during optimal lighting, typically early morning or sunset, ensuring stunning footage while leaving ample time to relish the destination. Enjoy the journey and periodically reconnect with the purpose of your travels. Capture plentiful material to enhance your editing process and create a lasting video memory.
Create a backup as soon as possible:
After a day of filming, prioritize backing up footage onto a hard drive. Ideally, create two backups for added security. Once organized, sift through the footage, selecting your preferred shots to import into your chosen video editor.
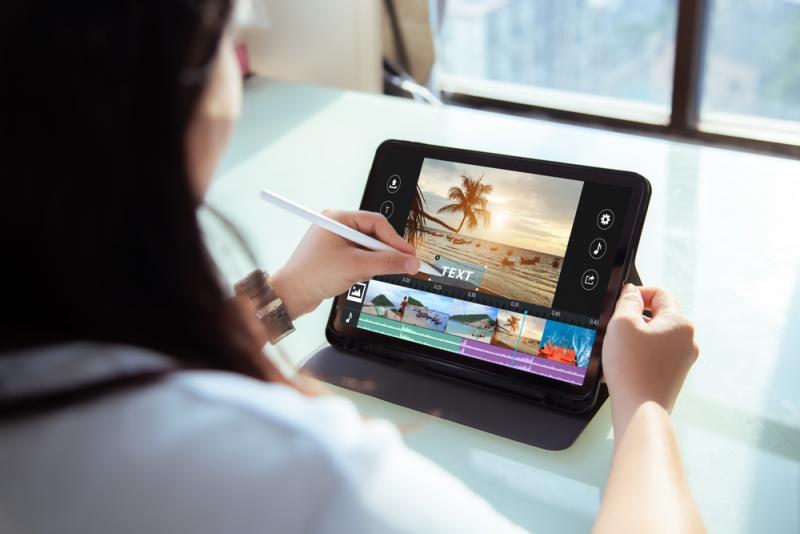
Editing Your Travel Videos
Make your edits consistent:
As you assemble your video, revisit your storyboard. This distinction between a mere clip compilation and a narrative is crucial. Although not a full-length documentary, each travel video possesses a story arc, even if it's a simple chronological account of your journey.
Maintain a comprehensive perspective during editing, ensuring a structured approach beyond assembling aesthetically pleasing clips. Group similar shots to form mini-scenes, connecting them intentionally to guide the viewer through a thoughtful sequence.
Remember, a video's effectiveness lies in purposeful sequencing and interconnected clips, even if the narrative subtleties may not be immediately apparent to others.
Music choice:
As you conclude your journey, dedicating at least a day to contemplate the musical backdrop for your travel videos becomes paramount, influencing how your audience perceives them. Choose fast, uplifting music with a climactic build and peak-drop dynamic.
MusicBed is a good source, offering a diverse selection of high-quality tunes at a reasonable price. You would appreciate the ability to filter by mood and genre, creating a personalized favorite list for later decisions.
Artlist provides an alternative with a cost-effective approach. For those seeking a free option, the Free Music Archive offers a rich library of quality music.
Post-music selection, you should focus on determining the optimal 3-4 minute length to captivate without overwhelming. Finally, use CapCut to meticulously organize and review your footage, categorized by country.
Initiate editing:
Tailor your video editing process to the content you have. Typically, you start by identifying the most uplifting part of the music, usually when the beat drops. Next, you select dynamic footage, like dancing or hyper-lapses, and experiment with sequencing on the timeline.
After finding the best clip, you gradually build upon it by connecting other footage through factors like camera movement, object motion, shape, colors, or luminance. This meticulous approach, spanning at least 2 days, ensures a captivating and distinctive video outcome.
Add overlooked recording:
If you're missing footage for seamless transitions in your travel videos, consider incorporating stock videos. We often use them to enhance transitions we forgot to capture on location. When lacking footage during editing, we recommend exploring stock videos on platforms like Shutterstock. It's our go-to for improving travel videos, offering a subscription-based model with diverse packages. It ensures access to an extensive library of stock footage for your specific needs.
Improve transition:
In the editing phase, you must meticulously arrange and merge all video clips on the timeline. After filling it, review the entire video, integrating refined transitions for a seamless flow.
Sound design:
To enhance the immersive experience, incorporate artificial sound effects, compensating for limitations in your built-in microphone and blocking unwanted noises. We often rely on Artlist's SFX section for an extensive collection, utilizing its efficient search and preview feature to select the perfect sound that complements our video's visuals. This meticulous process ensures a captivating travel video with polished transitions and enhanced audio.
Other edits:
When you are satisfied with your video sound effects, move on to color correction, upscale images, and colorize photo as per the requirements of the video. We use CapCut’s online to [ZK2] sharpen edges, and transform low-resolution images into high-resolution masterpieces.
Export and upload on the Internet:
After completing the project, export the video in ProRes 422, a quality-retaining yet reasonably sized raw format, keeping it as a backup. If necessary, convert the ProRes file into other formats, avoiding the time-consuming conversion through Adobe Premiere Pro. We've learned from experience that exporting in H264 MP4 initially compromises quality for a smaller file size, sacrificing significant detail compared to the ProRes format.
Final Words:
In crafting a travel film, prioritize enjoying the journey over technical perfection. Immerse yourself in the location and culture without undue concern for gear or budget; your passion and unique perspective matter most.
Share this article: